Are you looking to grant specific access to an AWS S3 bucket for an IAM user? Setting up fine-grained permissions ensures that the user can interact with the bucket according to your requirements. This guide will walk you through creating an inline IAM policy derived specifically to grant single S3 bucket access, ensuring secure and controlled operations within your AWS environment.
Create S3 bucket
Before getting started with the policy, first you need to create a S3 bucket. IAM access policy that we'll derive in the next section will be applied to this bucket.
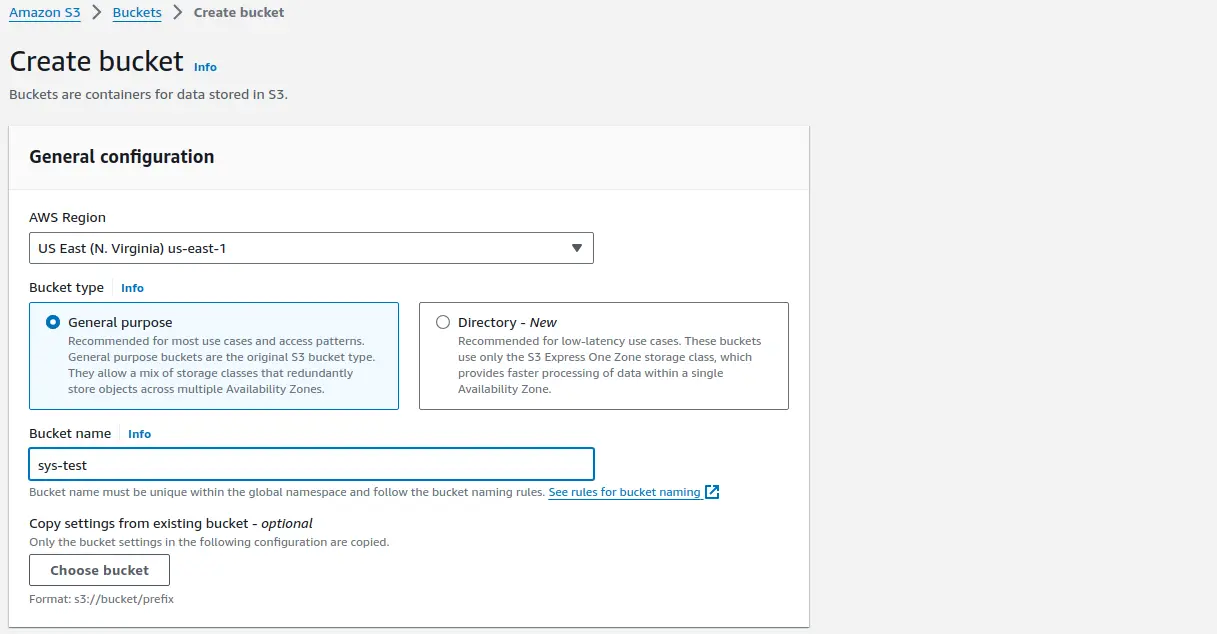
I've created a sys-test named bucket in us-east-1 region. While creating the bucket, leave all the other settings unchanged. Now that the bucket is created, It's time to create a new IAM user with custom policy for single S3 bucket access.
IAM user and policy
To create a new IAM user, click on Services > IAM > Users > Create user.
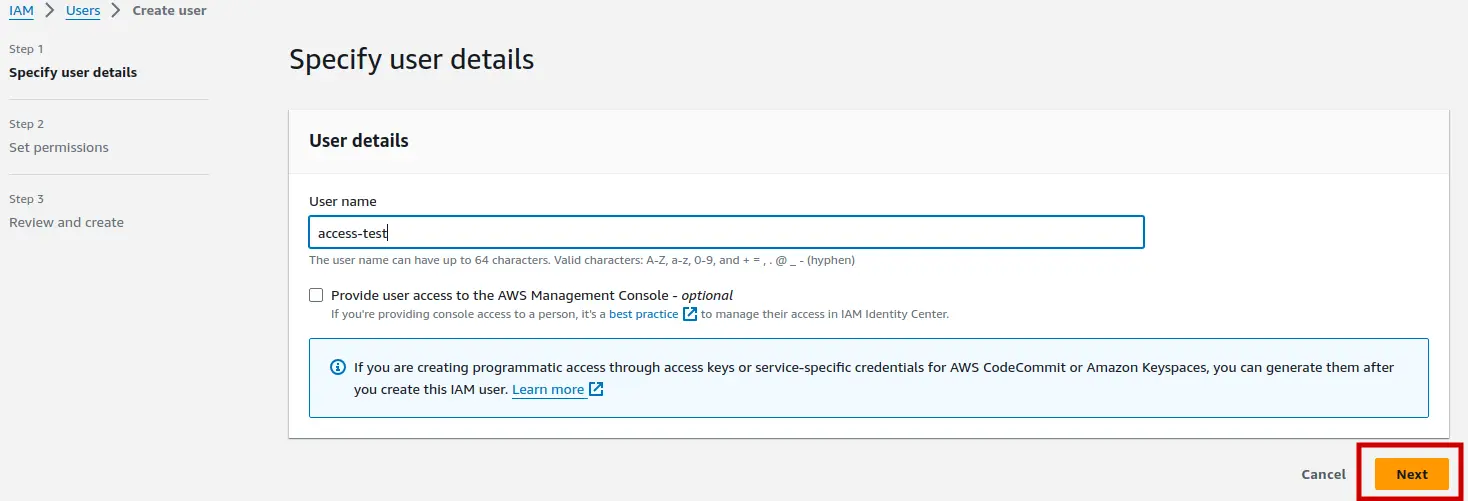
We'll create access-test named IAM user that will only have the CLI access. You can enable console access if required but this article will be focused on AWS CLI only. After naming the user, click on Next button. Keep everything else default and Create the user.
Now open the newly created user to add a custom IAM policy. Select Add permissions > Create inline policy option:

Policy editor will open. Select JSON from editing options and add the below policy in the policy editor box:

{
    "Version": "2012-10-17",
    "Statement": [
        {
            "Sid": "VisualEditor2",
            "Effect": "Allow",
            "Action": "s3:*",
            "Resource": [
            "arn:aws:s3:::sys-test",
            "arn:aws:s3:::sys-test/*"
            ]
        }
    ]
}
Now click Next and set a name for this policy. Click on Create policy button to create the policy. Now that the S3 bucket and IAM user policy has been created, It's time to create an Access key for the user and test if IAM user access for the specified S3 bucket works.
Create Access key
To create IAM user access key, select the newly created access-test user from IAM dashboard, and click on Security credentials > Create access key option.
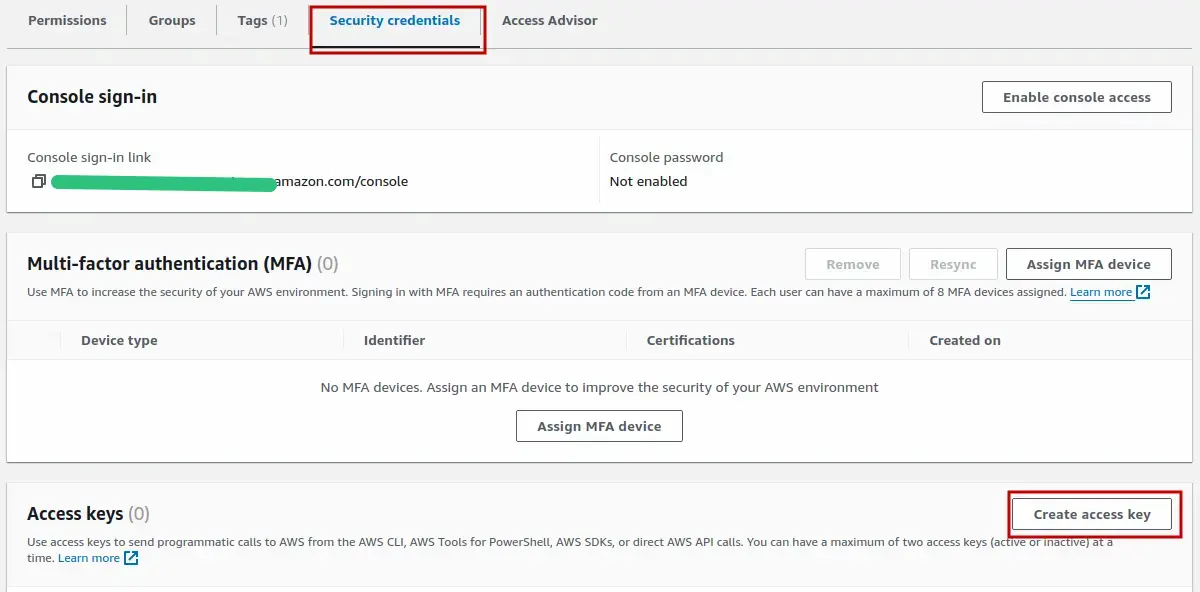
Select Command Line Interface (CLI) option in Use case, enter the appropriate descriptions for the key, and click on Create access key button. Your access key for account access-test is created. Make sure you copy this newly generated Access key and Secret Key or download the .csv file because you won't get the second chance to copy the Secret key after this.
Test S3 access with AWS CLI
To test the S3 bucket access using AWS CLI, first we need to configure AWS CLI using the access-test user's Access key and Secret key. Make sure AWS CLI is installed in your system. Refer to AWS CLI Installation to install the latest version of it.
To configure AWS CLI, use the below command:aws configure

Make sure you use the same region for AWS CLI as your S3 bucket. After you are done with configuration, use aws s3 ls sys-test command to list sys-test bucket files. The output will be empty because It's a new bucket and there are no files in it. If the command is executed without any error, It means our Access key is working as expected and we can access the AWS account using CLI. Now let's put some files in the S3 bucket:
touch file.txt # Creating an empty file
$
aws s3 cp file.txt s3://sys-test # Uploading the file in S3 bucket

We successfully uploaded the file into our S3 bucket. To verify if the file is uploaded, again use the list command:
aws s3 ls sys-test

As you can see in above image, file.txt named file has been successfully uploaded into the S3 bucket. You can remove this file using aws s3 rm s3://sys-test/file.txt command.
Conclusion
This way you can create your own IAM policy for a user to allow or deny access to a specific S3 bucket. Keep in mind that this policy only gives access to specified bucket only. User cannot list this bucket or any other bucket using aws s3 ls command. To list all other buckets, use the below policy:
{
    "Version": "2012-10-17",
    "Statement": [
        {
            "Sid": "VisualEditor2",
            "Effect": "Allow",
            "Action": "s3:*",
            "Resource": [
            "arn:aws:s3:::sys-test",
            "arn:aws:s3:::sys-test/*"
            ]
        },
        {
            "Sid": "VisualEditor3",
            "Effect": "Allow",
            "Action": "s3:ListAllMyBuckets",
            "Resource": [
                "*"
            ]
        }
    ]
}
Using this policy, the user still has read/write access to a specified bucket but can also list all other buckets. However, the user cannot read/write on those other buckets. Listing only the specified bucket while hiding all the others required additional changes in the policy. If you know how to do it, let me know in the comments.


