Migrating a running EC2 machine from one AWS account to another seems a complicated task. But by utilizing the available resources and with careful planning, you can easily achieve this. There are several ways to migrate an EC2 machine across AWS accounts but we are going to explore the easiest one.
We'll use Amazon Machine Image (AMI) to create an Image from EC2 instance and use that image in the target AWS account to create a new EC2 Instance.
Requirements
To test or perform this migration, you need two separate AWS accounts. One AWS account will act as source and another AWS account will act as target.
- Source AWS account where EC2 is running.
- Target AWS account where EC2 needs to migrated.
As keeping this migration process simple and easy, there are not many requirements. In the next section, we'll start with creating the AMI of our running EC2 instance.
Creating AMI of EC2 instance (Source account)
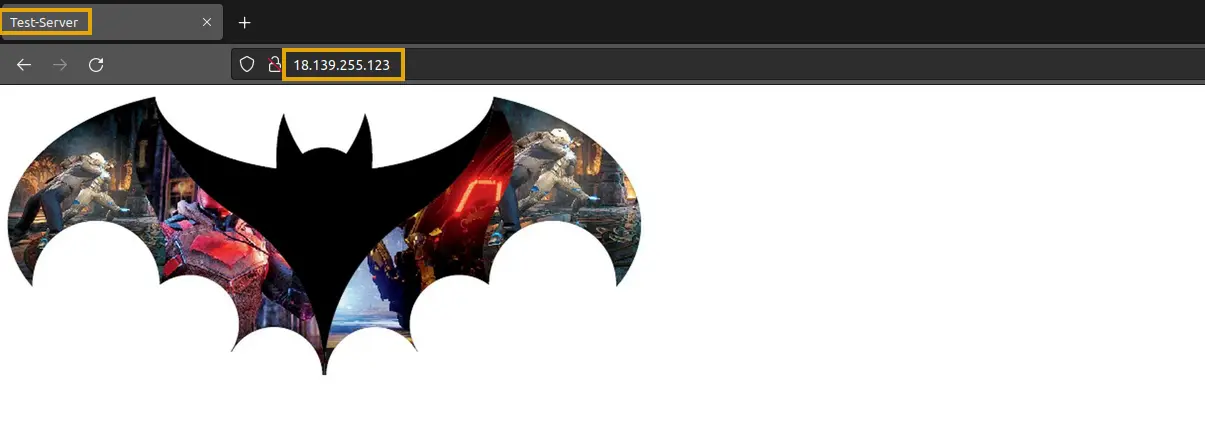
An EC2 instance, with Nginx web server, is running on my source AWS account. A single-page website is hosted on this EC2 instance just so we can confirm that everything is migrated as expected.
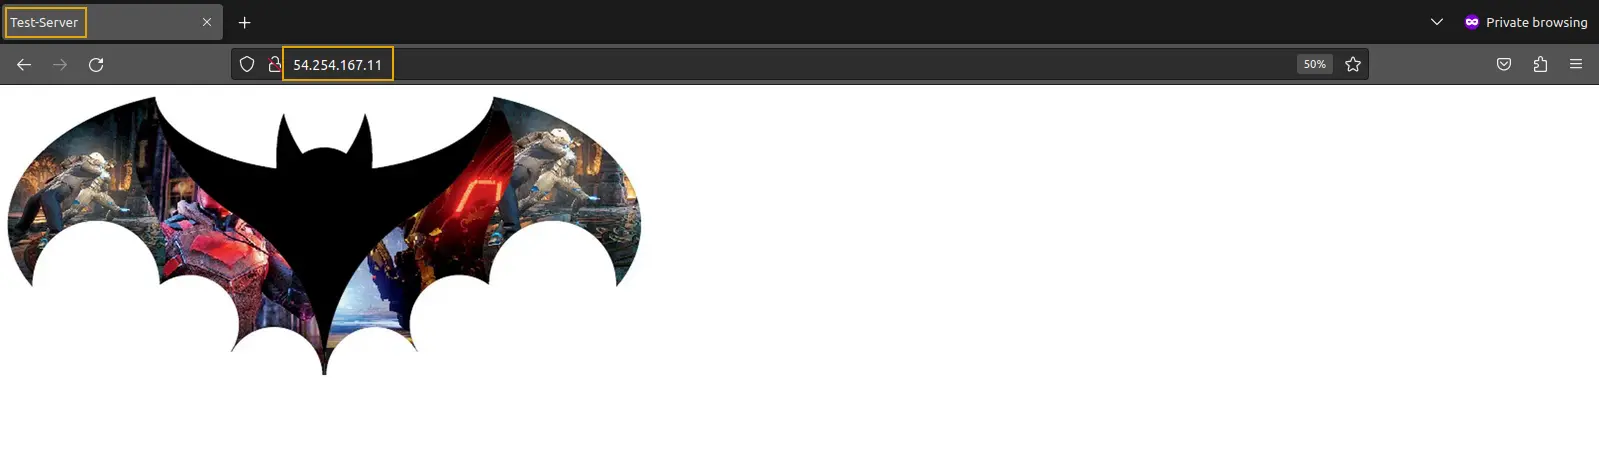
The Above webpage is being served by Nginx web server that is running on EC2 instance in the source AWS account. Title of webpage is Test-Server and It's being accessed from 54.254.167.11 IP-Address.
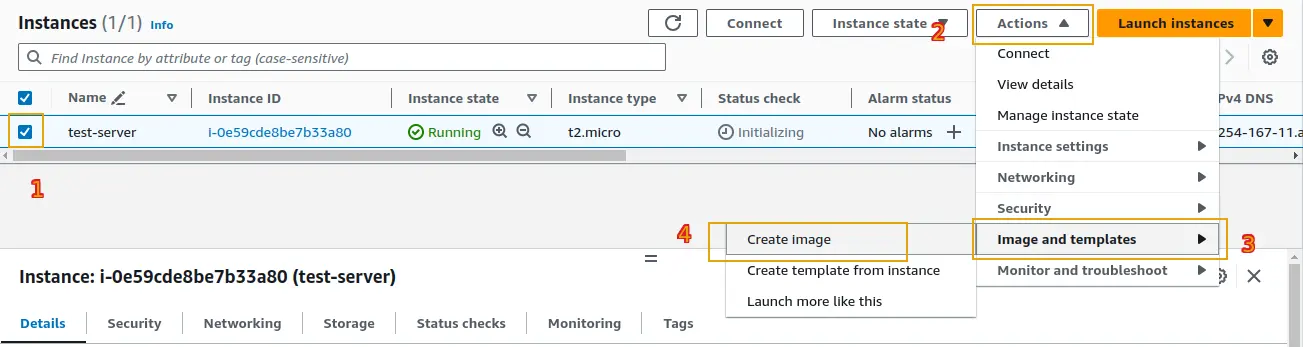
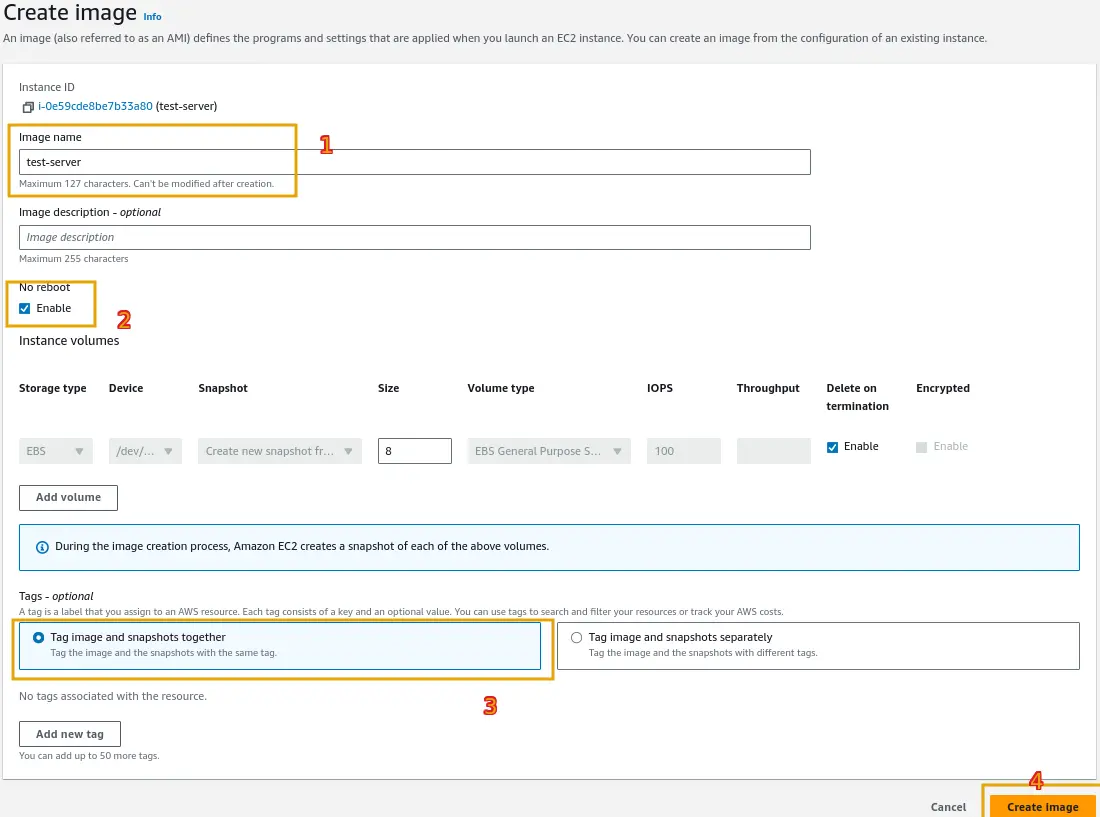
To create AMI of this EC2 instance, follow the steps below:- Select EC2 instance > Actions > Image and templates > Create image
- Set the AMI name in Image name field. Also mark No reboot as Enable. Now keep everything unchanged and click on Create image.
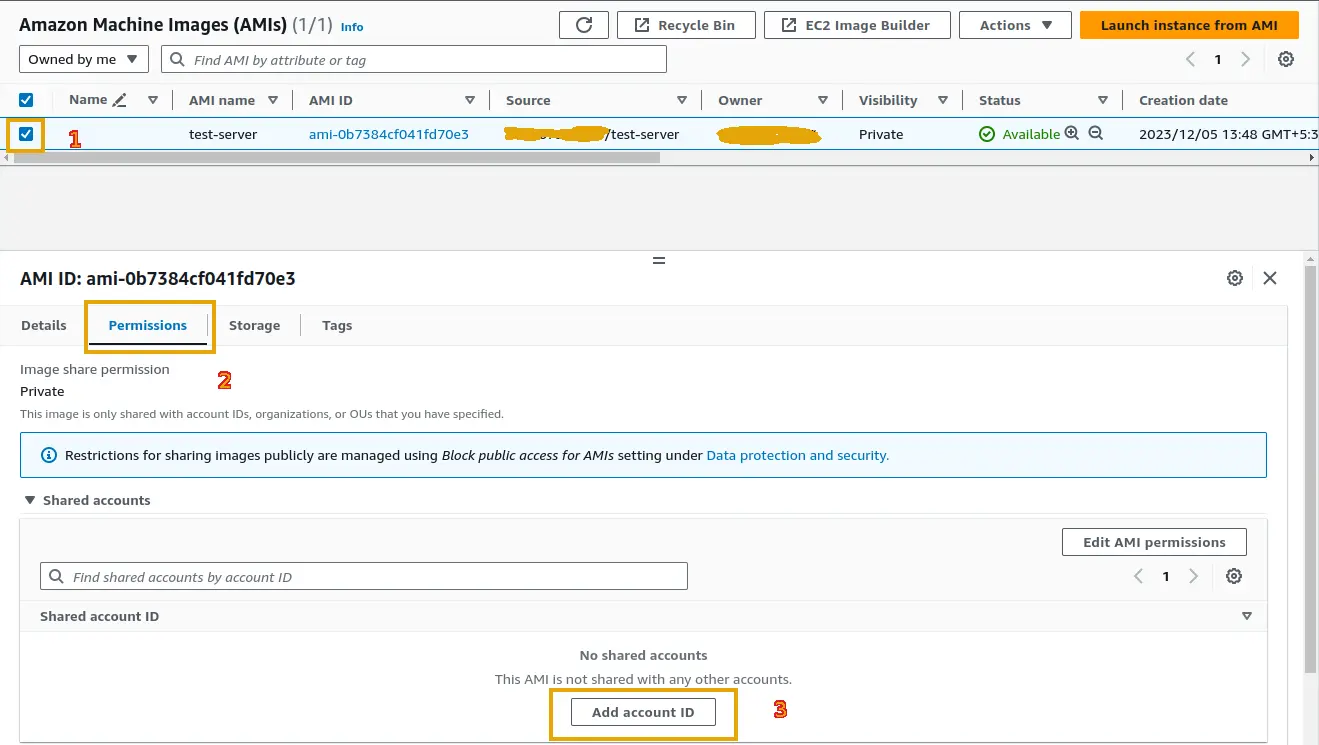
- To check and verify if the AMI has been created for our EC2, click on AMIs under Images in Left-side menu. You can see the source EC2 instance detail in Source option and status of this AMI under Status, which is Available means this AMI is ready to use.

Above process will also create a snapshot of the selected EC2 instance. This snapshot will be used by AMI to launch EC2 instances in any region under any AWS account.
Sharing AMI with target account
Now to use this AMI in the target AWS account to launch EC2 instance, we need to share this AMI with the target AWS account. To share the AMI, use the below process:
- Select AMI image that you want to share.
- Choose Permissions to manage sharing aspects of AMI.
- Under Shared accounts click on Add account ID button to share this AMI with another AWS account.
- You'll be prompted to input Account ID. Type or paste your target AWS Account ID here and then click on Save changes to complete the sharing process.
Now your AMI is shared with the target AWS account. This image can now be used to launch a new EC2 instance that will be the replica of source AWS accounts EC2 instance.
Using AMI to create EC2 instance (Target account)
Now that we have created the AMI of EC2 instance that we want to replicate or migrate, login to the target AWS account for the next steps. We will use this AMI that was shared from the source AWS account to launch a new EC2 instance.
Replicating security group rules
Before we start launching a new instance using AMI, first we need to make sure that the target account and source account security group rules for EC2 are the same. In my case, the source account security group only has TCP ports 22, 80, and 443 allowed under Inbound rules. For this migration to work properly, the target AWS account security group should also have these ports allowed.
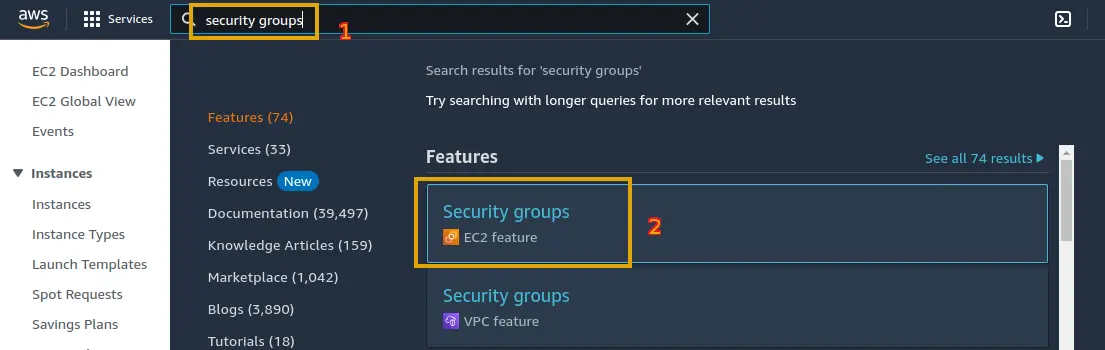
- Search
security groupsis AWS search bar. - Select Security groups EC2 feature from the list.
Security groups for EC2 page will open. All you need to do is to create a new Security group with Inbound rules similar to security group in source AWS account. In my case, I need to allow TCP 22, 80, and 443 ports.
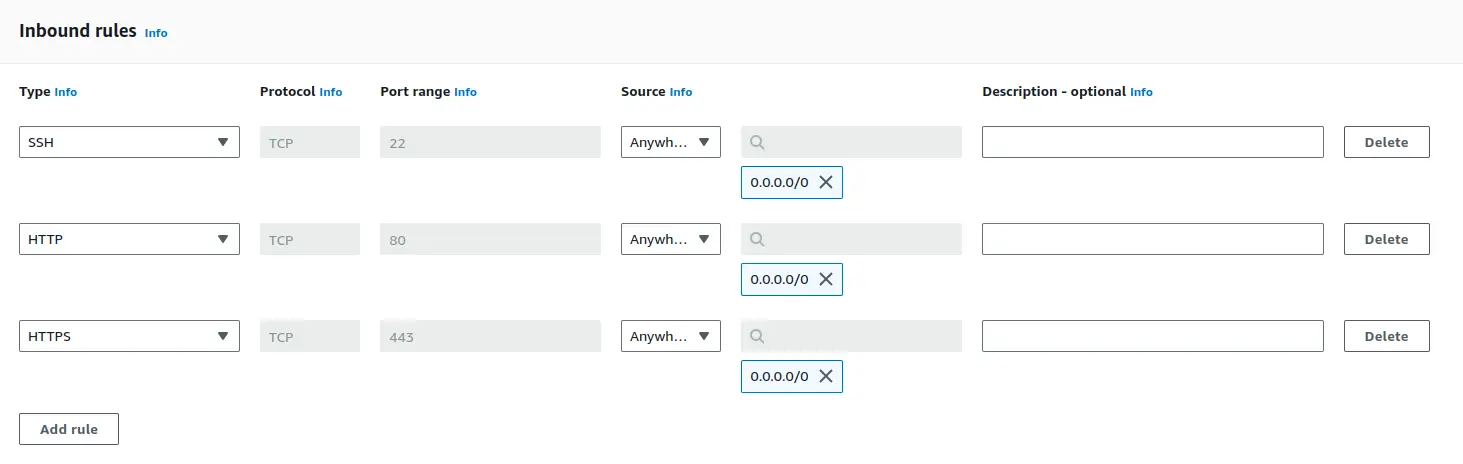
As can be seen in the image above, all the required ports are added to the Inbound rules of the new security group. Now we'll attach this security group with the EC2 instance which will be launched using AMI shared by the source AWS account.
Launch Instance from AMI
In the previous section, we shared AMI from the source AWS account to our target (current account) AWS account. It's time to use that AMI to launch Instance while attaching the security group that we created earlier.

- Select AMIs from left side menu.
- Click on Owned by me to reveal the dropdown menu.
- Select Private images from the options to list all AMIs shared with you.
You can see all the AMIs shared with your account. Select the AMI that we created and shared in the previous step and click on Launch instance from AMI to start the migration process. You'll be redirected to the Instance launch page. Now you need to attach the security group created earlier with this instance.
- Under Key pair (login), select Proceed without a key pair to launch the instance without specifying any SSH key. You can still log in with your source EC2 credentials (whether It's password-based or SSH key).
- Under Firewall (security groups), select an existing security group we created earlier that contains the same inbound rules as source security group.
No further changes are needed. Now launch the instance to create the Instance from selected AMI. This process might take some time. After the Instance state shows Running, try to access the EC2 Instance IP address in the browser.
As you can see in the image above, this same webpage indicates that the EC2 Instance has been completely migrated from source AWS account to target (current account) AWS account. Notice that the IP address has been changed because every EC2 instance is assigned a new IP address upon creation.
Complete steps
This method of creating AMI and launching instance from that AMI is very efficient when the goal is to completely migrate the EC2 instance. To perform this migration, below are the steps that are explained above in detail:
Source AWS account:- Create AMI of EC2 Instance on source AWS account.
- Share this AMI with the target AWS account using Account ID.
- Look at the security group attached to EC2 instance and note down the Inbound rules.
- Create a new security group with the same Inbound rules as the security group attached to source EC2 instance.
- Open AMIs and select the Private images to list all shared AMIs.
- Select the respective AMI and Launch instance from that image. Make sure to select the security group that was created in the earlier steps.
- If you did everything right, EC2 Instance will be launched and It'll be a complete replica of the source EC2 instance.
Conclusion
This process of replicating an existing EC2 instance using AMI is very efficient and easy to execute. A couple of things you should keep in mind are that launching an EC2 instance from AMI in the target account will not preserve the source EC2 IP address. You have to modify your DNS records to point your domain toward this new EC2 instance.
Any SSH keys or other types of credentials will remain intact. If you were using the SSH key to log in, you can use that same SSH key to access this new EC2 instance as well. All local user passwords will be as same as source EC2 instance. Security groups are the only things that you have to create and attach manually to this new EC2.
This article is focused on very basic Instance replication but the same method can be utilized to move more complex EC2 instances easily.